Booting Persistence Kali on VirtualBox & VMware
- Hellfire0x01

- Oct 7, 2022
- 4 min read
Hey all y'all! I had this thought of creating a live USB persistent Kali for a very long time, and I finally started working on it. It was fun playing around with it, so I thought, why should I document this process? Well, here you go!
Download & make USB Bootable
To download the Kali Live image, let's head over to the Kali.org website. We will see this beautiful UI of the website. Let's click on the DOWNLOAD button,

We will be taken to the get-kali, where we need to select the desired image for our purpose today. I am interested in Live Boot image,

The website will take us to the area where we can see the 3 types of images that are available to download. Let's quickly download the Kali 2022.3 (middle one),

Next, to make our USB bootable, we need to download the Rufus software. We will then run the Rufus software, select our USB in Device, select the ISO (downloaded Kali image), move the slider to max out the persistent partition size (Rufus creates persistent storage) as mine is 3, yours can vary!

Clicking on the START button will first show us that it needs to download the additional ldlinux.sys, and ldlinux.bss files. Go ahead by clicking on Yes,

Then it will prompt us to warn us for erasing all the data on the USB. Do it!

From here, we can:
Inject our USB in our system.
Press Win Key → Power → Shift + Restart.
Select our USB to boot Kali from it.
....or we can go ahead to live boot the Kali in VirtualBox & VMware. Let's look how we can do it.
On VirtualBox
Now that our device is ready for live boot, we juustttt need to check, and set a few things to boot our Kali in VirtualBox. To start, open the Command Prompt as Administrator.
For that, press Win + R → type cmd → Press CTRL + Shift + Enter. Then, we need to navigate to "C:\Program Files\Oracle\VirtualBox". To find out how many drives/disks we currently have, issue diskpart command. Microsoft says,
The diskpart command interpreter helps you manage your computer's drives (disks, partitions, volumes, or virtual hard disks).
After issuing diskpart command, we will enter into the diskpart command interpreter, and we need to list all the drives. For that, issue list disk command. We have 3 Disks available, namely Disk 0, Disk 1, Disk 2 (which is my USB device),

After determining the physical disk, we need to actually issue this command to create a raw VMDK file on the base of device the C drive that will boot with our PhysicalDrive2 (USB Drive),
VBoxManage internalcommands createrawvmdk -filename C:\usb.vmdk -rawdisk \\.\PhysicalDrive2
Next, we need to start VirtualBox as Administrator,

Let's start by clicking on New button. Enter the name of the machine,
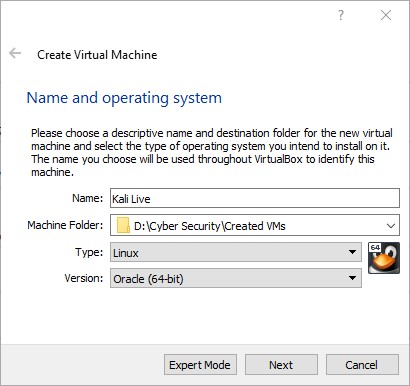
Provide memory size,
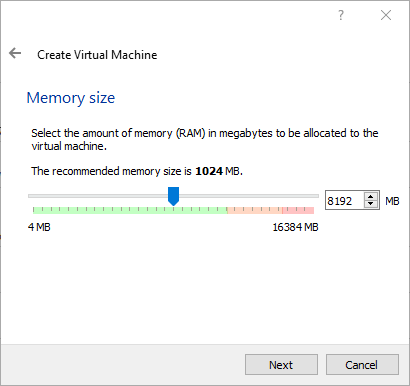
Then select the 3rd option, and provide the path to the raw VMDK file we created,

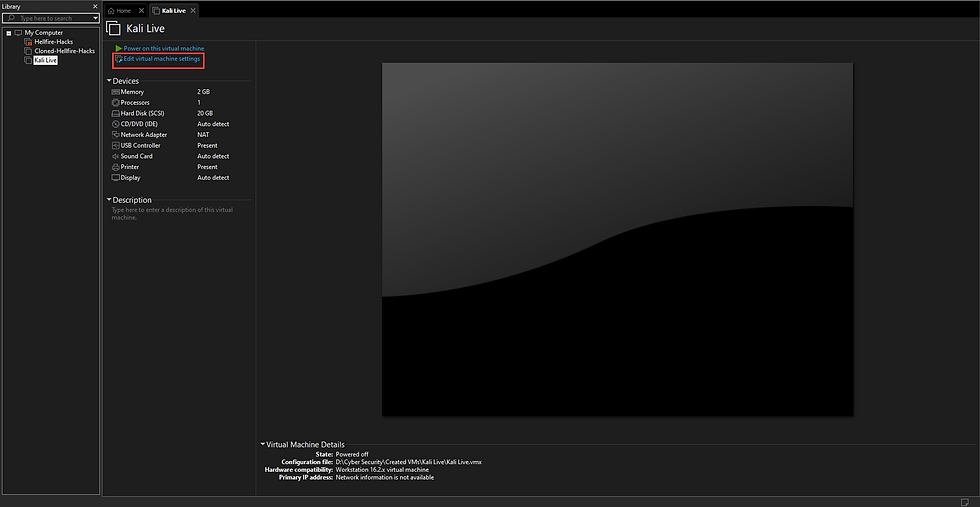
This will create our VM. Now, some quick twitch in the settings – Increase the processor(s) to 2,

Click on the Controller: SATA. Then check mark the Use Host I/O Cache (else live booting will have problems or might not be able to boot up),

Click on USB Plus Green button to add the USB device,

Finally! Everything is done. Start the machine, choose Live USB Persistence, and wait for the Kali to boot up!

After sometime, we can see the Kali interface (looks dazzling, isn't it?),

Checking if the internet is working correctly,

Now, to test the persistency of this Kali machine, we need to create a file named test with some text in it, This text is created by Hellfire0x01.,

Then, we will shut down the machine using shutdown now command, boot it up again, and we will see the file persists even after the reboot,

On VMware
Let's follow the same on VMware as well! Let's start the VMware as Administrator,

Then, we need to create a new VM,

Now, we need to select how we wanna create the VM,

Now, we will go with 3rd option,

Select Linux as a Guest OS,

Naming the VM,

Specify the Disk Capacity,

Finally, click on Finish to create one!

On the dashboard, we can see our machine is successfully created,
Let's twitch some settings real quick! Let's click on Add... button,

Now, let's quickly add the Hard Disk,

Select what's recommended to you, mine is SCSI

Then select 3rd option to Use a physical disk (because we need to boot from a USB drive),

Let's select the PhysicalDrive2 (USB drive), and use the entire disk,

Name the VMDK file whatever you want,

Next, we need to disable the side channel mitigations for Hyper-v enabled hosts, and firmware type to UEFI,

Click on Finish! Click on Ok!

Now we can finally start the machine, and go with the USB persistence mechanism!

So, it was fun for me playing around with this thing. While I was in the midst, I was so frustrated because this was throwing me the errors that I was not able to figure out. But in the end, I was persistent, and made this job done. I hope you learned something from this blog. Well then, take care. Until next time.


Comments