How To Setup A Phishing Campaign Using GoPhish - Part 2
- Hellfire0x01

- Sep 12, 2022
- 9 min read
Updated: Dec 6, 2022
Hey. Hope you all are healthy. In my previous blog, I demonstrated how we can spin up our EC2 instance and install gophish on it. In this one, we will go through multiple important steps before sending the phishing mail to Hellfire user (Phishing Myself :D) from purchasing the free domain name, to configuring the Amazon's SES and Route53 service, to setting up SSL for our domain, and then sending test mail to actually phishing to Hellfire0x01 user.
NOTE : One essential point to highlight regarding the Amazon Route 53 service is that it won't charge/bill you if the hosted zone is deleted within 12 hours of creation. After that, you will be charged/billed with $0.50 per month/hosted zone.
In this blog, I have tried my best to utilize all the free resources. For eg, you don't need to pay for domain name, SSL certificate, DNS or SMTP service (although remember the Note regarding Route 53).
Special thanks to my dear friend 0xAsif, without his help, support, and encouragement, it wouldn't have been possible to complete this little project! Now, let's dive in!!
Purchasing the Free domain name
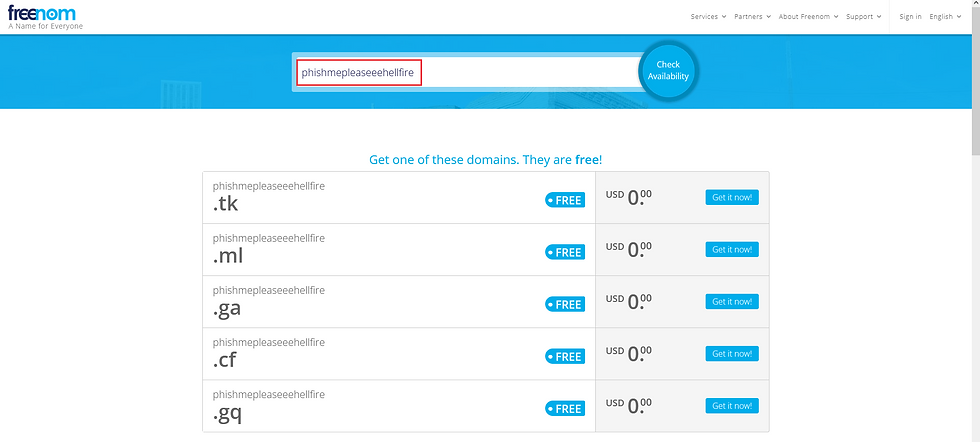
First things first, we need a domain name in order to be able to send the phishing mail. I tried to search many times on Google regarding free domain names, but got zero results. Then I found this gem, Freenom. A website which provides free domain names, as well as DNS resolvers,

To purchase the domain name, we will search for our domain name, phishmepleaseeehellfire, and we can see that there are many domains like .tk, .ml, .ga, .cf, .gq that are free to purchase,
I am currently interested in .cf domain. For some reason, when clicking on Get it now, it was showing domain not available. So I went forward with searching the domain in the search bar and selected it,

After clicking on Checkout button, we can click on drop down menu to select how for how many months we need to purchase this domain. I select for 1 month,

After clicking on continue, we will see this review page. We can submit the temporary mail from temp-mail and clicking on Verifying My Email Address,

It will send the verification mail on our submitted mail account. We just need to click on the link to verify ourselves,

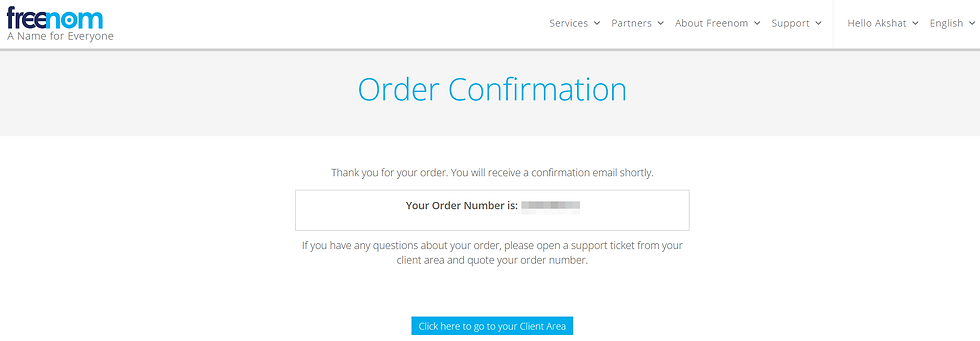
After that, we will receive the message that our order has been confirmed,
Note: If, in case, you got this error, Some of your domains could not be registered because of a technical error. These domains have been cancelled: - phishmepleaseeehellfire.cf, please try again with your mobile hotspot. I think the website is not allowing the request from a router thinking it is a bot, maybe.
Then I logged into the website. In the Services drop-down, there is a My Domains tab,

Clicking on it will take me to a page where I can see my purchased domains,

Wuahahahahhah! We are done with purchasing the domain name. Now, let's get moving to another thing, which is domain registration.
Configuring Route 53
It took me a long time to search for the service on which I can register a domain for free, and Amazon doesn't cease to amaze me. Let's see how we can Register a new domain. AWS says,
You can use Amazon Route 53 with domains you register with Route 53, and with domains you have registered with other DNS providers.
In the search bar, we need to search for Route 53, which is listed on the top. Let's select it,

On the Route 53 Dashboard, there is a DNS management. And this is exactly we need to configure the DNS,
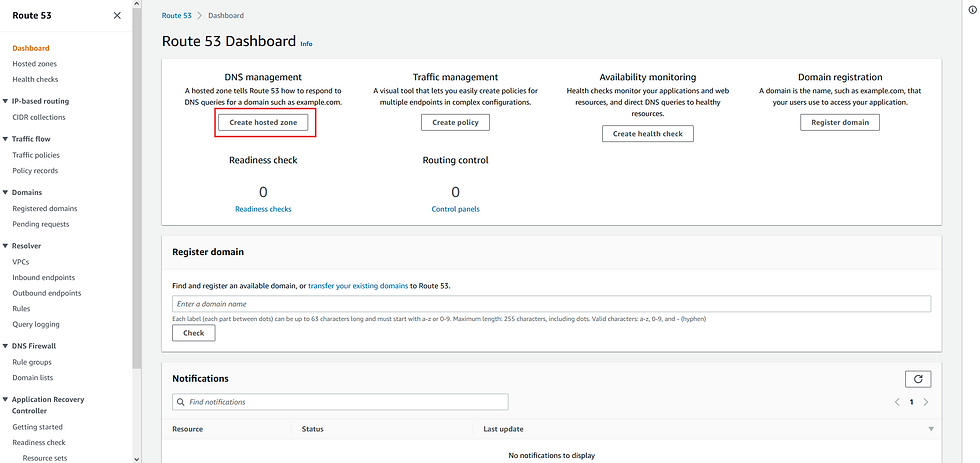
Let's create a hosted zone by providing the domain name we purchase earlier, i.e., phishmepleaseeehellfire.cf and selecting the option Public Hosted Zone (selection of this option is a must!),

Clicking on Create hosted zone will create a zone for us with the NS and SOA records! Remember the Note at the start – Hosted zone are free for first 12 hours, and after that, you will be charged $0.50 per month.

Then we just need to go into Manage Domain,

And click on the Management Tools drop-down menu. Click on Nameservers,
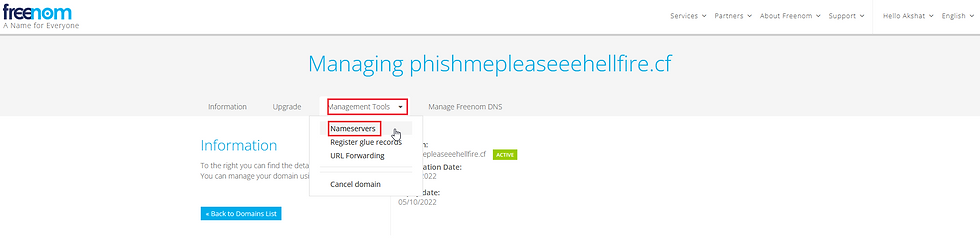
Here, we need to add here those four NS records that were generated on Route 53,

After making changes, it will save them successfully!!

Now, moving to the MAIL service with Amazon SES.
Setting up SMTP server with Amazon SES
With the Amazon SES (Simple Mail Service), we can send the emails using SMTP (Simple Mail Transfer Protocol) interface. AWS says,
To send production email through Amazon SES, you can use the Simple Mail Transfer Protocol (SMTP) interface or the Amazon SES API. Amazon SES sends email using SMTP, which is the most common email protocol on the internet. You can send email through Amazon SES by using a variety of SMTP-enabled programming languages and software to connect to the Amazon SES SMTP interface.
Now let us quickly search for SES in the search bar. On the top of the list is the Amazon Simple Email Service,

The dashboard is pretty simple, yet so fascinating. Isn't it?

We will quickly create an identity by clicking on Create identity button. Select the type of Domain; enter the name of the domain we bought; check the Use a custom MAIL FROM domain followed by entering the name of the subdomain,

Then select the Easy DKIM so that we can modify our DNS settings, and DKIM key length of RSA_2048_BIT. Finally, click on Create identity,

We see that our CNAME, MX, and TXT records has been created,

Now, we will add all these records in Route 53 along with A records. So, going back to hosted zone's phishmepleaseeehellfire.cf in Route 53, click on Create record,

Then, we need to enter the record name and its corresponding value.
After adding all the records along with record A (notice I added the A record twice, first and last record, one being phishmepleaseeehellfire.cf and the other being www.phishmepleaseeehellfire.cf, both pointing to the running EC2 instance on which Gophish is installed),

At this point, we will navigate to the SES page and click on SMTP settings, and we should receive a page like this. Here, we need to click on Create SMTP credentials,

Here will see a page like this by default. You can go on and change the name of IAM User if you want, like I did, and then click on Create button to generate the credentials. Save those credentials somewhere safe. We are going to need them later,

With this, we are done configuring the DNS and SMTP settings. Let's get the SSL certificate for our domain.
SSL for our domain (:
The main aim to set up the SSL certificate for our domain is to make our domain looks legit so that our emails won't land in the user's junk. You can refer this article to generate a SSL certificate or directly follow with me through the steps below,
1. First, let's install the Let's Encrypt package and checking the status if the certbot is running with systemctl command,
sudo apt install letsencrypt
systemctl status certbot.timer
2. Then generate SSL certificate without registering email,
sudo certbot certonly --standalone --agree-tos --preferred-challenges http -d phishmepleaseeehellfire.cf --register-unsafely-without-email
3. Finally, install auto setup of certificate with certbot,
sudo certbot -d phishmepleaseeehellfire.cf --manual --preferred-challenges dns certonly
From here on, switch to root user using sudo su, and we need to copy the generated certificate and the key to the directory where gophish is installed,
cp /etc/letsencrypt/live/phishmepleaseeehellfire.cf/fullchain.pem gophish-v0.12.0-linux-64bit/public.crt
cp /etc/letsencrypt/live/phishmepleaseeehellfire.cf/privkey.pem gophish-v0.12.0-linux-64bit/private.key
But since it has the root user permission, we need to change the permission to the Ubuntu user with chown command,
chown ubuntu:ubuntu private.key public.crt
Now, we can again have a quick look at the config.json file,

Let's quickly edit the config.json file by replacing the phish_server.cert_path from example.crt to public.crt, and phish_server.key_path from example.key to private.key, change the port from 80 to 433 because HTTPS uses port 433, and phish_server.use_tls from false to true,

Now, if we start the gophish server using sudo ./gophish, navigating to https://phishmepleaseeehellfire.cf:3333, and clicking on the padlock icon, there is still no connection secure message persist,

To make this work, let's use this SSL certificate in admin_server as well,

Our website will be encrypted with the immediate effect once the website is reloaded,

At last, we came back to where we left in the last blog, but with so much more additions like our own domain name, SMTP and DNS services and SSL certificate for our domain name,

Config - Sending Test Mail
Before sending the test mail, I want to tell you a quick short incident that happened with my when I was sending the test mail. So I made a gmail account; tried to send the mail to my gmail account, and google marked my domain name as phishing domain. LMAO! Then I stopped the Gophish server and restart it again and it worked just fine. All this made me to go with the outlook email instead of gmail one. XD
Note : Before moving ahead, create a new temporary account on Microsoft Outlook, so we can test this mail.
Now, we will start with creating a Sending Profile for our test mail. I mentioned the SMTP from phishmepleaseeehellfire@outlook.com because I want to send the mail from this address; Host as email-smtp.ap-south-1.amazonaws.com:587 because we are utilizing the Amazon SES service along with the Username and Password that we generated in SMTP credentials,

Here I throw in the temporary email (just for testing purpose). This showed me up that both the email address I have used are not verified, meaning I need to verify these emails before sending out the test mail,

In the Amazon SES' Verified Identities, let's quickly create an identity,

Select the Email address, throw in the email that you want to verify, and click on **Create identity,

With this, I got the confirmation mail on the email I set here.
After email verification, I refreshed the page. This showed me that my both emails have been verified,

Now, when I tried to send the mail to the innocent guy (The Lazy Admin), it sent successfully!! :D
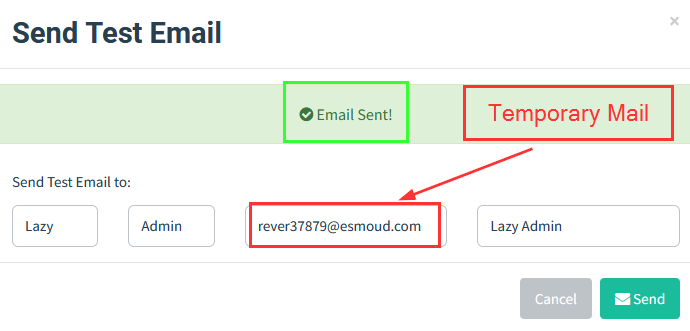
In the temporary mail inbox, I received the mail!

After all these tests, I renamed this profile to LetTheDaddyPhishYou,

Config - Building Up Landing Page
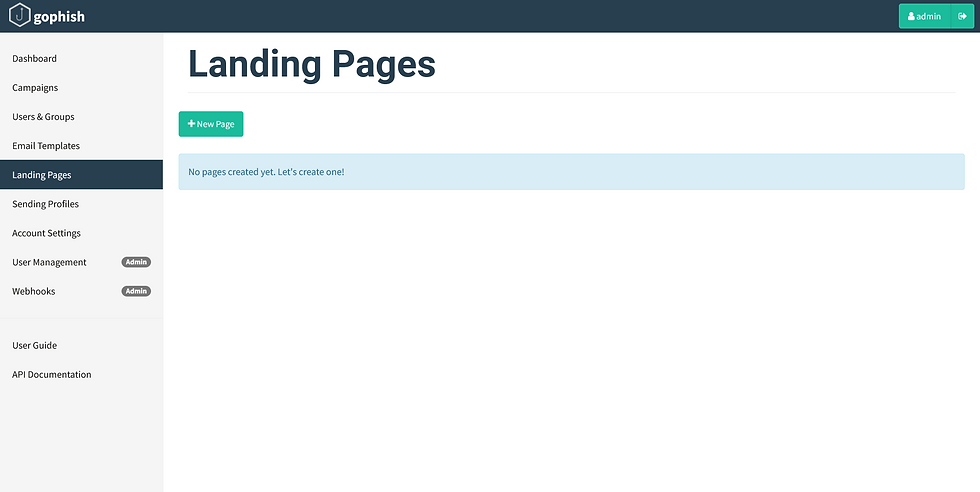
Navigating to the Landing Pages, this is the section where we need to create the page where a user lands when they click on a particular link,
The landing page I want to create will be of LinkedIn. So, I clicked on Import Site button and paste this https://www.linkedin.com. This will import the source code of the webpage,
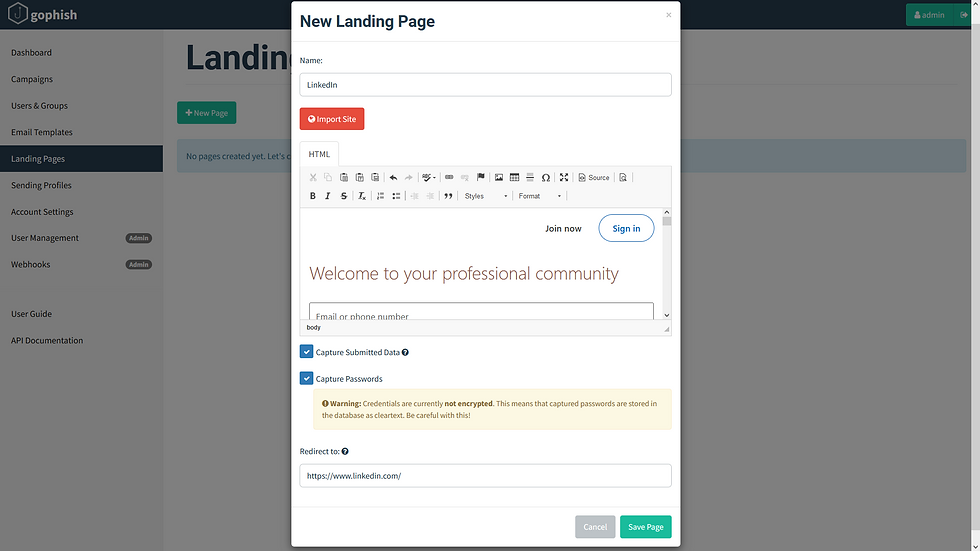
and save the page!

Config - Creating Email Templates
Next is the Email Templates, which is the emails we want to send them to the user,

In my Gmail inbox, I searched for a LinkedIn email. From here, we want the raw text, so we will click on the Show Original,

A new tab will be opened, and we can see this large chunk of text,

We can click on the Copy to clipboard button and the source code will be copied. Then back in our Gophish, we can just paste the raw text by clicking on the Import Email and this will quickly import the mail,

We can see how well it did the job,

Saving the email template,

Config - Creating Users & Groups
NOTE : Before moving further, take a moment to create another outlook account which will be our victim ahead.
Now, we need to create a Users & Groups, the one which we are about our phishing mail to,

We can add the details of the user and their corresponding email,
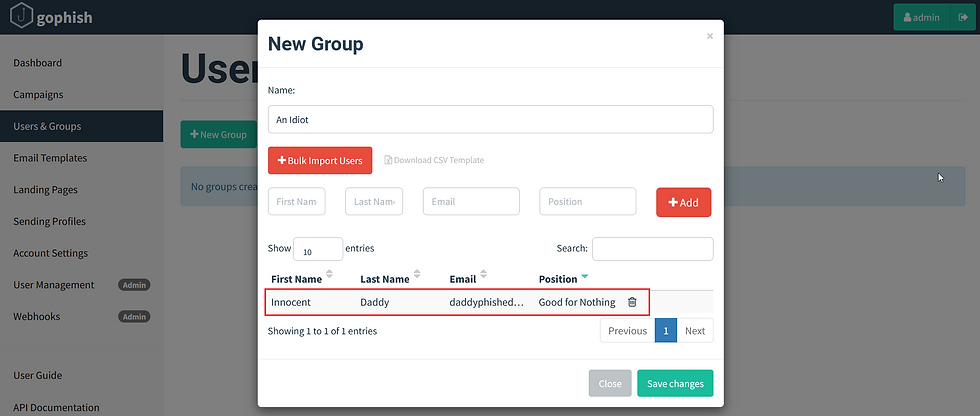
and saving this template,

Final Quest - The Campaign
Now, are you ready for it? We finally made it till the end!!! My appreciation for you all.
Before creating the Campaign, let's actually add another legit outlook email account and verify it,

Quickly navigating to the Campaigns and creating a one for us,

Let's do this. XX)

CLIIIIIIIIICCCCCCCCKKKKKKK ON THE BUTTON!!!

Scrolling down, we see that our email is sent to the desired user,

Innocent Daddy user opens up their inbox and received their email,
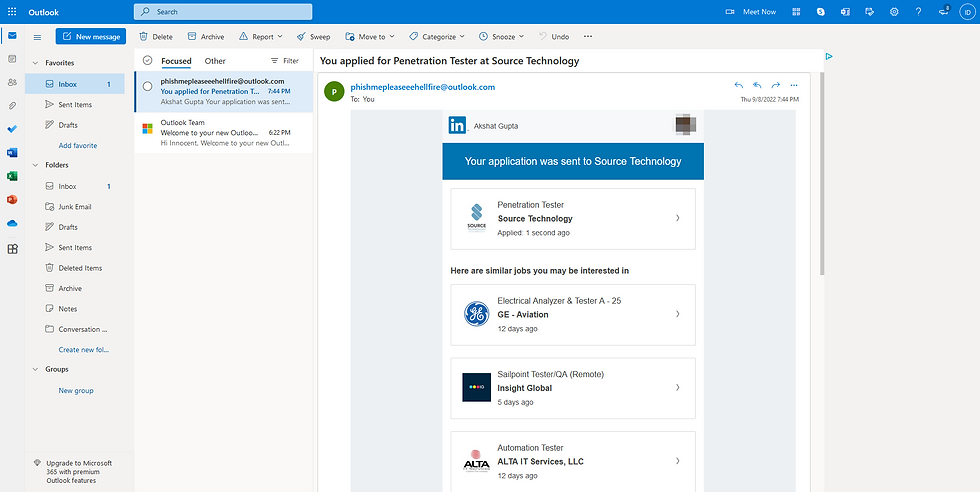
When the user clicked on the link (notice how changes occur on the Campaign Dashboard), he will be taken to this page,

Now, he thinks that this page doesn't load correctly and might think he should login anyways by submitting their credentials,

Then he will be redirected to the actual page of the LinkedIn. He might have felt something strange, but wouldn't have bothered to go into the details, and might have logged in again to do their job,

And since we are evil guy, we got their whole response activity in our timeline,
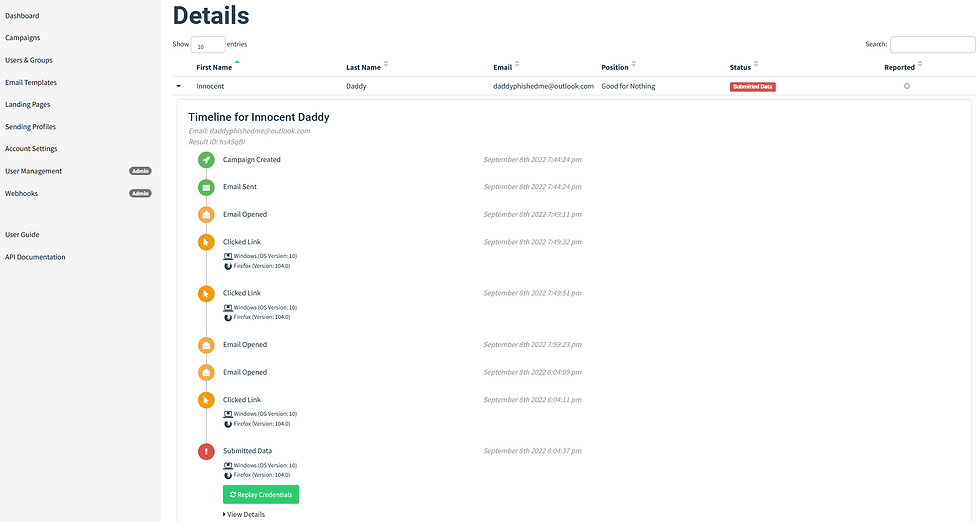
We can even take a good look at the credentials they submitted on the webpage,

This campaign timeline can be seen to determine how many emails out of total emails have been opened, how many links were clicked, how many of the users actually submitted their data (credentials), and how many of them actually reported the mail!

With this, we have completed the hands-on approach with how we can purchase the domain name for free, to setup the DNS and SMTP server, to generate a SSL certificate, and from sending the test mail to sending an actual phishing email. I hope with these two blogs, you have learned something from it. It was an immense pleasure, fun, learning to explore and document all these things to present it to you all. Thanks for being with me till the end.
To make this series a bit more interesting, I will come up with another blog where we will be.............. let's keep it suspense, I guess. In the next part, Part 3: we will analyze these Phishing Emails. Till then, take care. I wish you prosperity. Bye.


But whats the point if we have to verify victims email before sending phishing mails to it? Please correct me if my understanding is wrong.
is there a way to setup SES service in GCP?
This is very well written and incredibly in-depth. Well done @Hellfire0x01 !